> ## Documentation Index
> Fetch the complete documentation index at: https://trigger-v3-fix-additional-files.mintlify.site/llms.txt
> Use this file to discover all available pages before exploring further.
# OAuth
> Use OAuth to authenticate your team or to add Integrations to your product so your users can connect their accounts.
## 1. Create an Integration client (in code)
```ts
//1. Import the Integration packages you want to use
import { Slack } from "@trigger.dev/slack";
import { Github } from "@trigger.dev/github";
//2. Create a new instance of the Integration client
const slack = new Slack({
//this is used to identify the connection
id: "slack",
});
//GitHub supports OAuth (as well as Personal Access Tokens)
const github = new Github({
//this is used to identify the connection
id: "github",
});
```
When using OAuth, you only need to specify the `id`.
## 2. Use the Integration client
There are two way to use Integrations in a Job:
* You can perform Tasks in the `run` function, by passing the Integration client into the `integrations` object.
* You can use webhooks to Trigger a Job.
This example send a Slack message when someone stars the `trigger.dev` GitHub repo 🤩.
```ts
client.defineJob({
id: "star-slack-notification",
name: "New Star Slack Notification",
version: "0.1.0",
//1. If you want to use the Integration in the run function, add it here
integrations: { slack },
//2. If the Integration supports webhooks, you can use them here
trigger: github.triggers.repo({
event: events.onNewStar,
owner: "triggerdotdev",
repo: "empty",
}),
run: async (payload, io, ctx) => {
//3. Because we add `slack` to Integrations, it comes through to `io.slack` here
const response = await io.slack.postMessage("Slack star", {
text: `${payload.sender.login} starred ${payload.repository.full_name}.\nTotal: ${payload.repository.stargazers_count}⭐️`,
channel: "C04GWUTDC3W",
});
},
});
```
## 3. Creating the OAuth connection in the dashboard
Now you need to setup the OAuth client in the dashboard. You will use the `id` that you specified in your code to associate them.
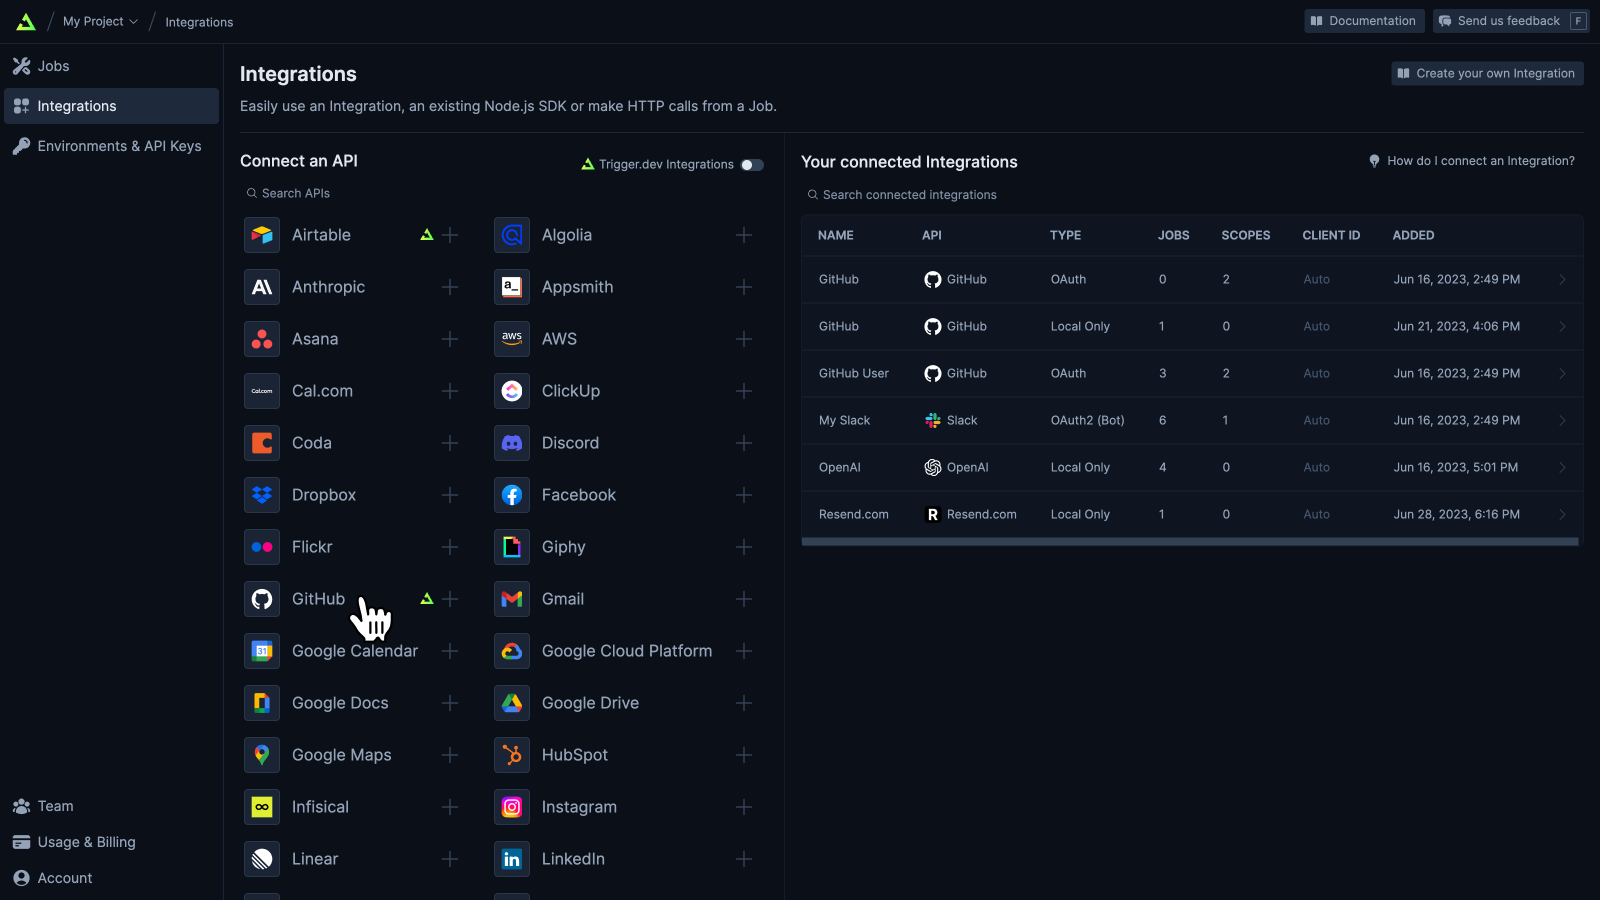
1. Go to the "Integrations page" in your dashboard. Click the Integration you want to setup.
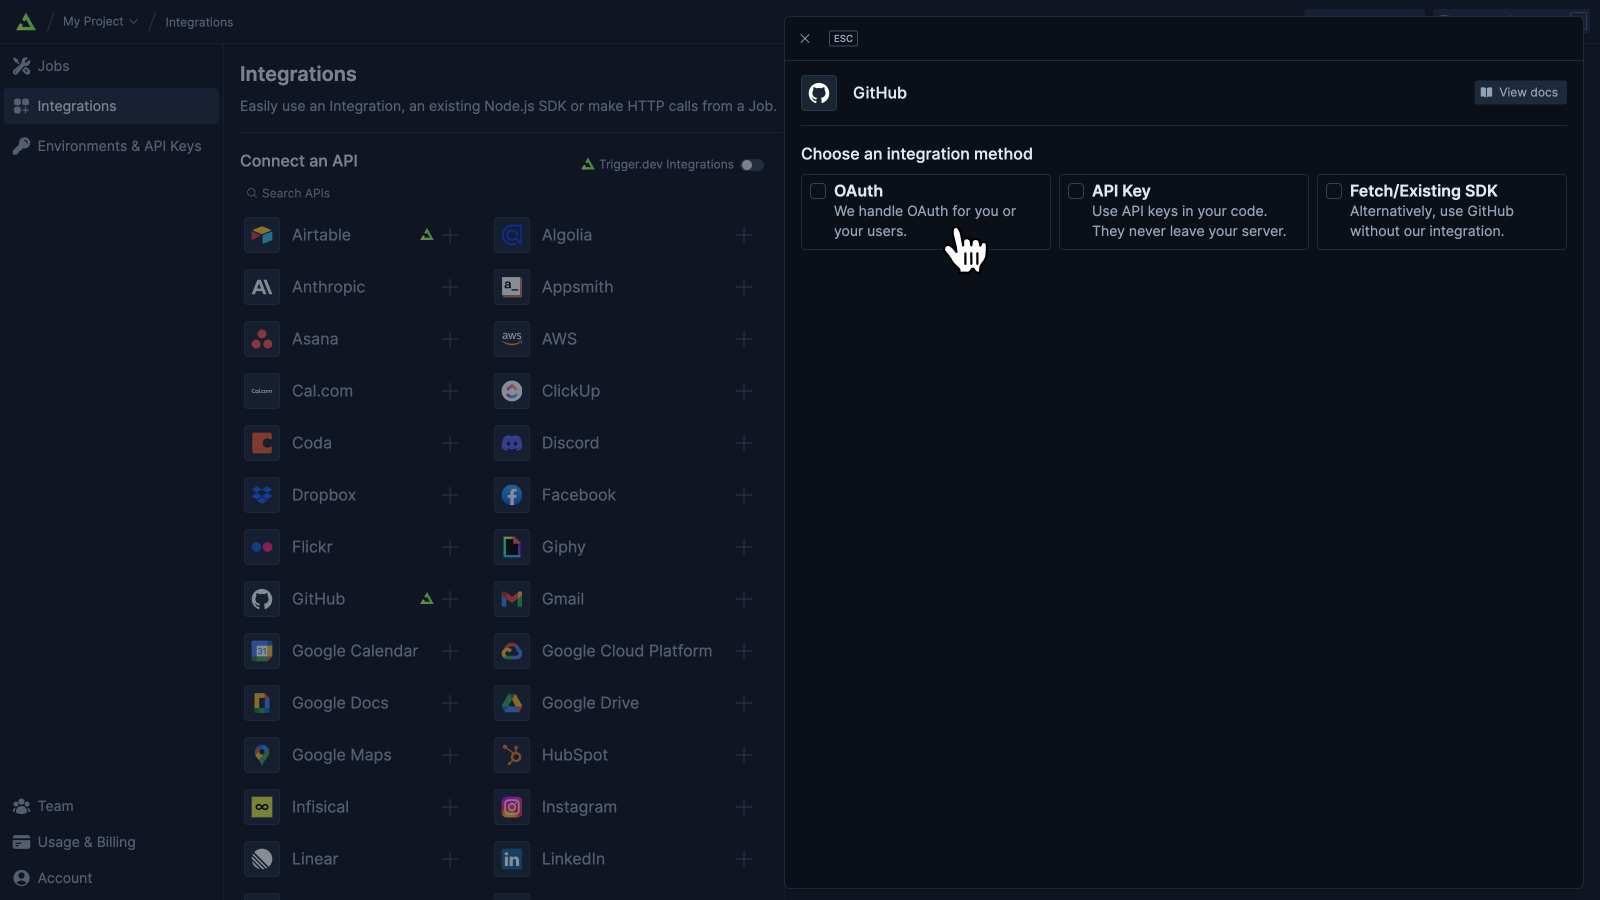
2. Select OAuth as the authentication type.
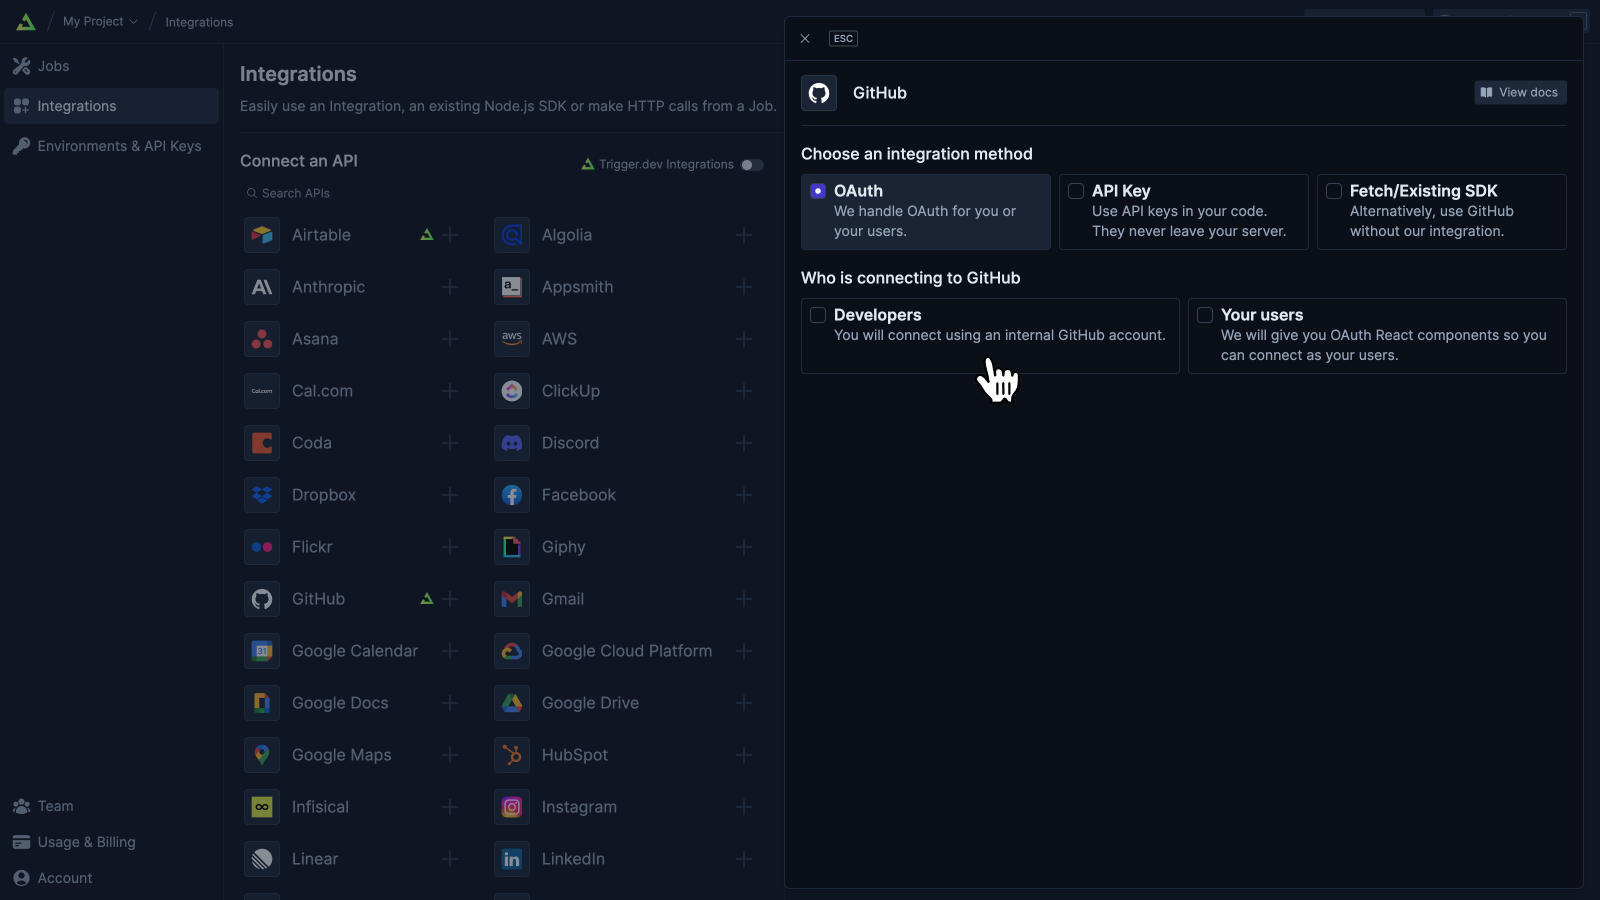
3. Select "Developer" as the user type.
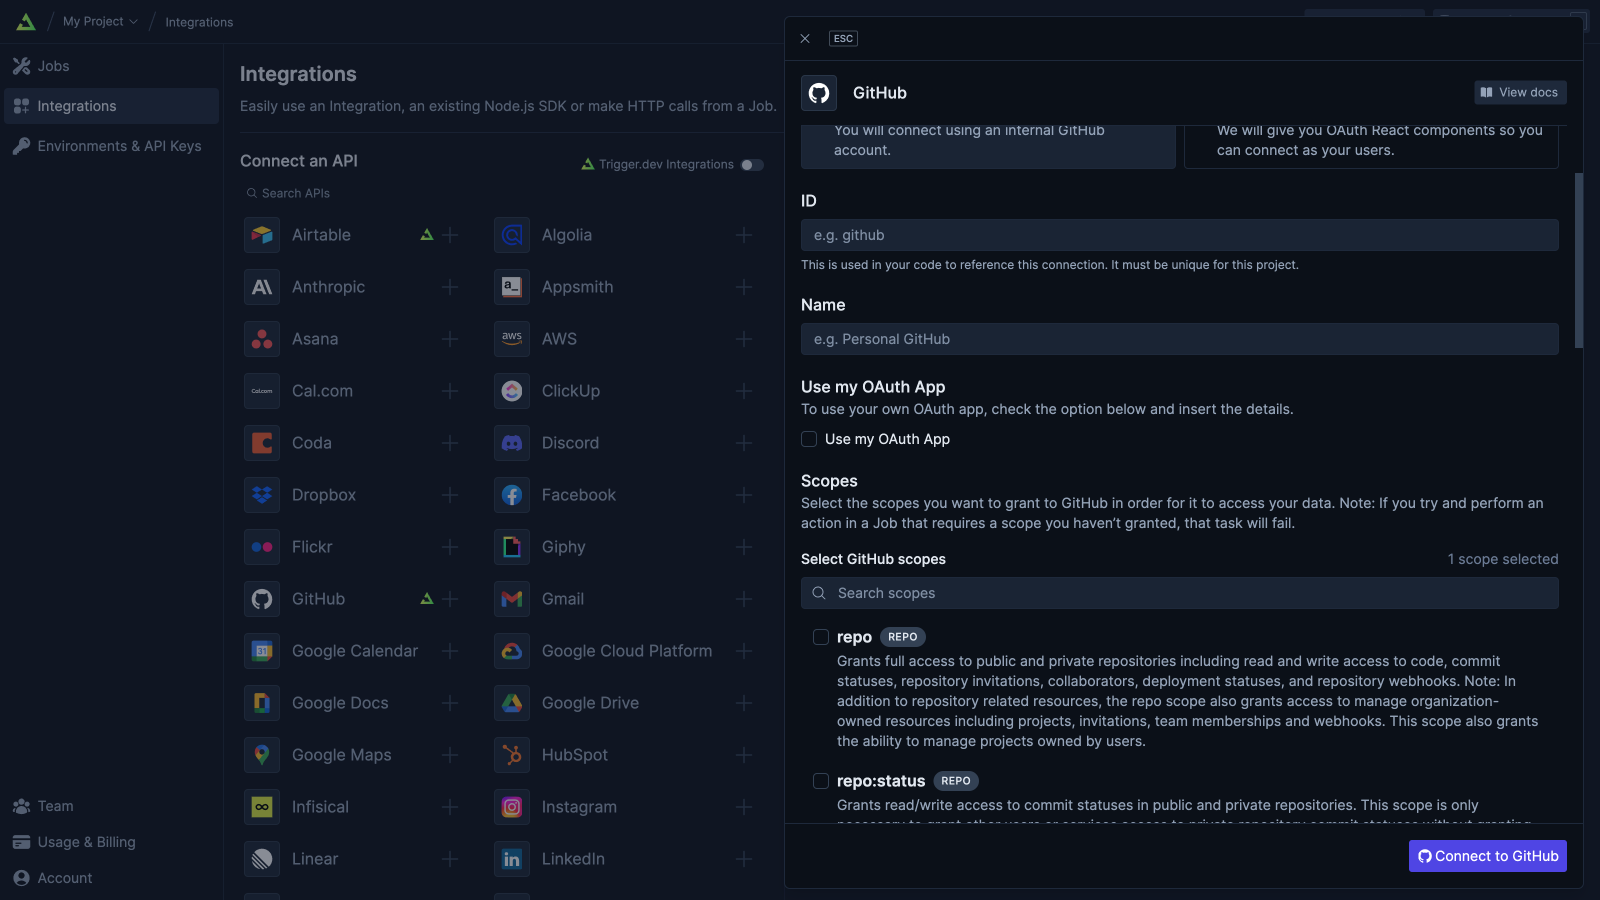
4. Enter the `id` that you specified in your code. Select the scopes that you want and enter a unique title.
5. Click the Connect button, it will take you through the OAuth flow.
## 4. Viewing your connection clients
### The Integrations page
### Connected OAuth integration detail page
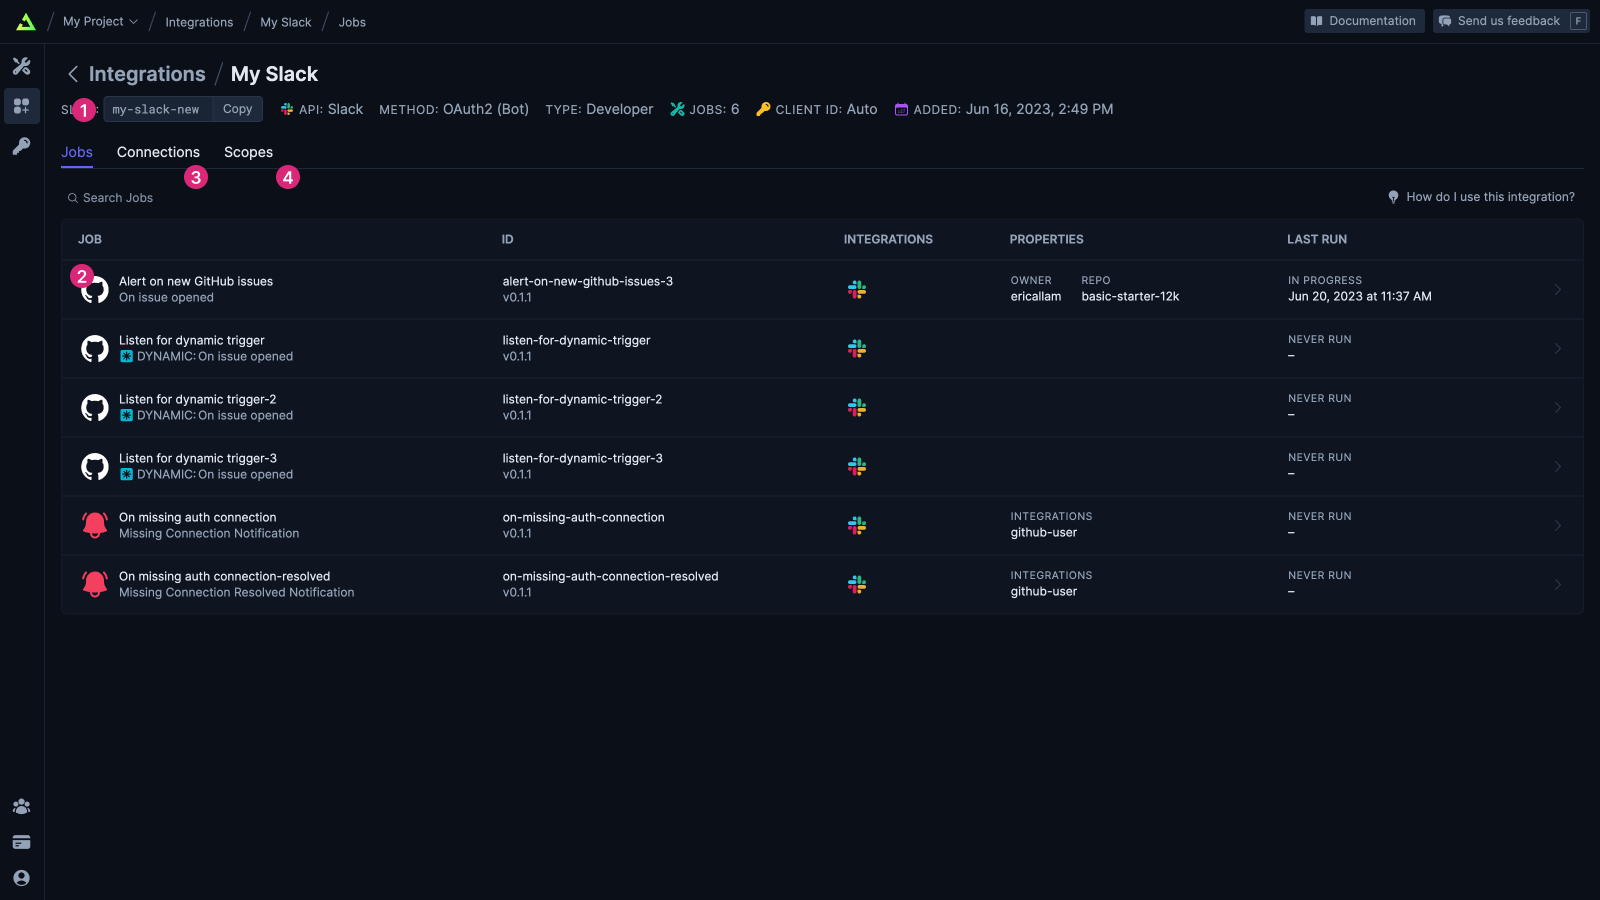
Some useful things on this page
1. The `id` that you gave the connection when you defined it in your code
2. The Jobs that are using this connection
3. All the connections associated with this Integration client (there will be more than one if you're authenticated your users)
4. The scopes that this connection has access to
## References
Trigger.dev integrates with a wide range of services.