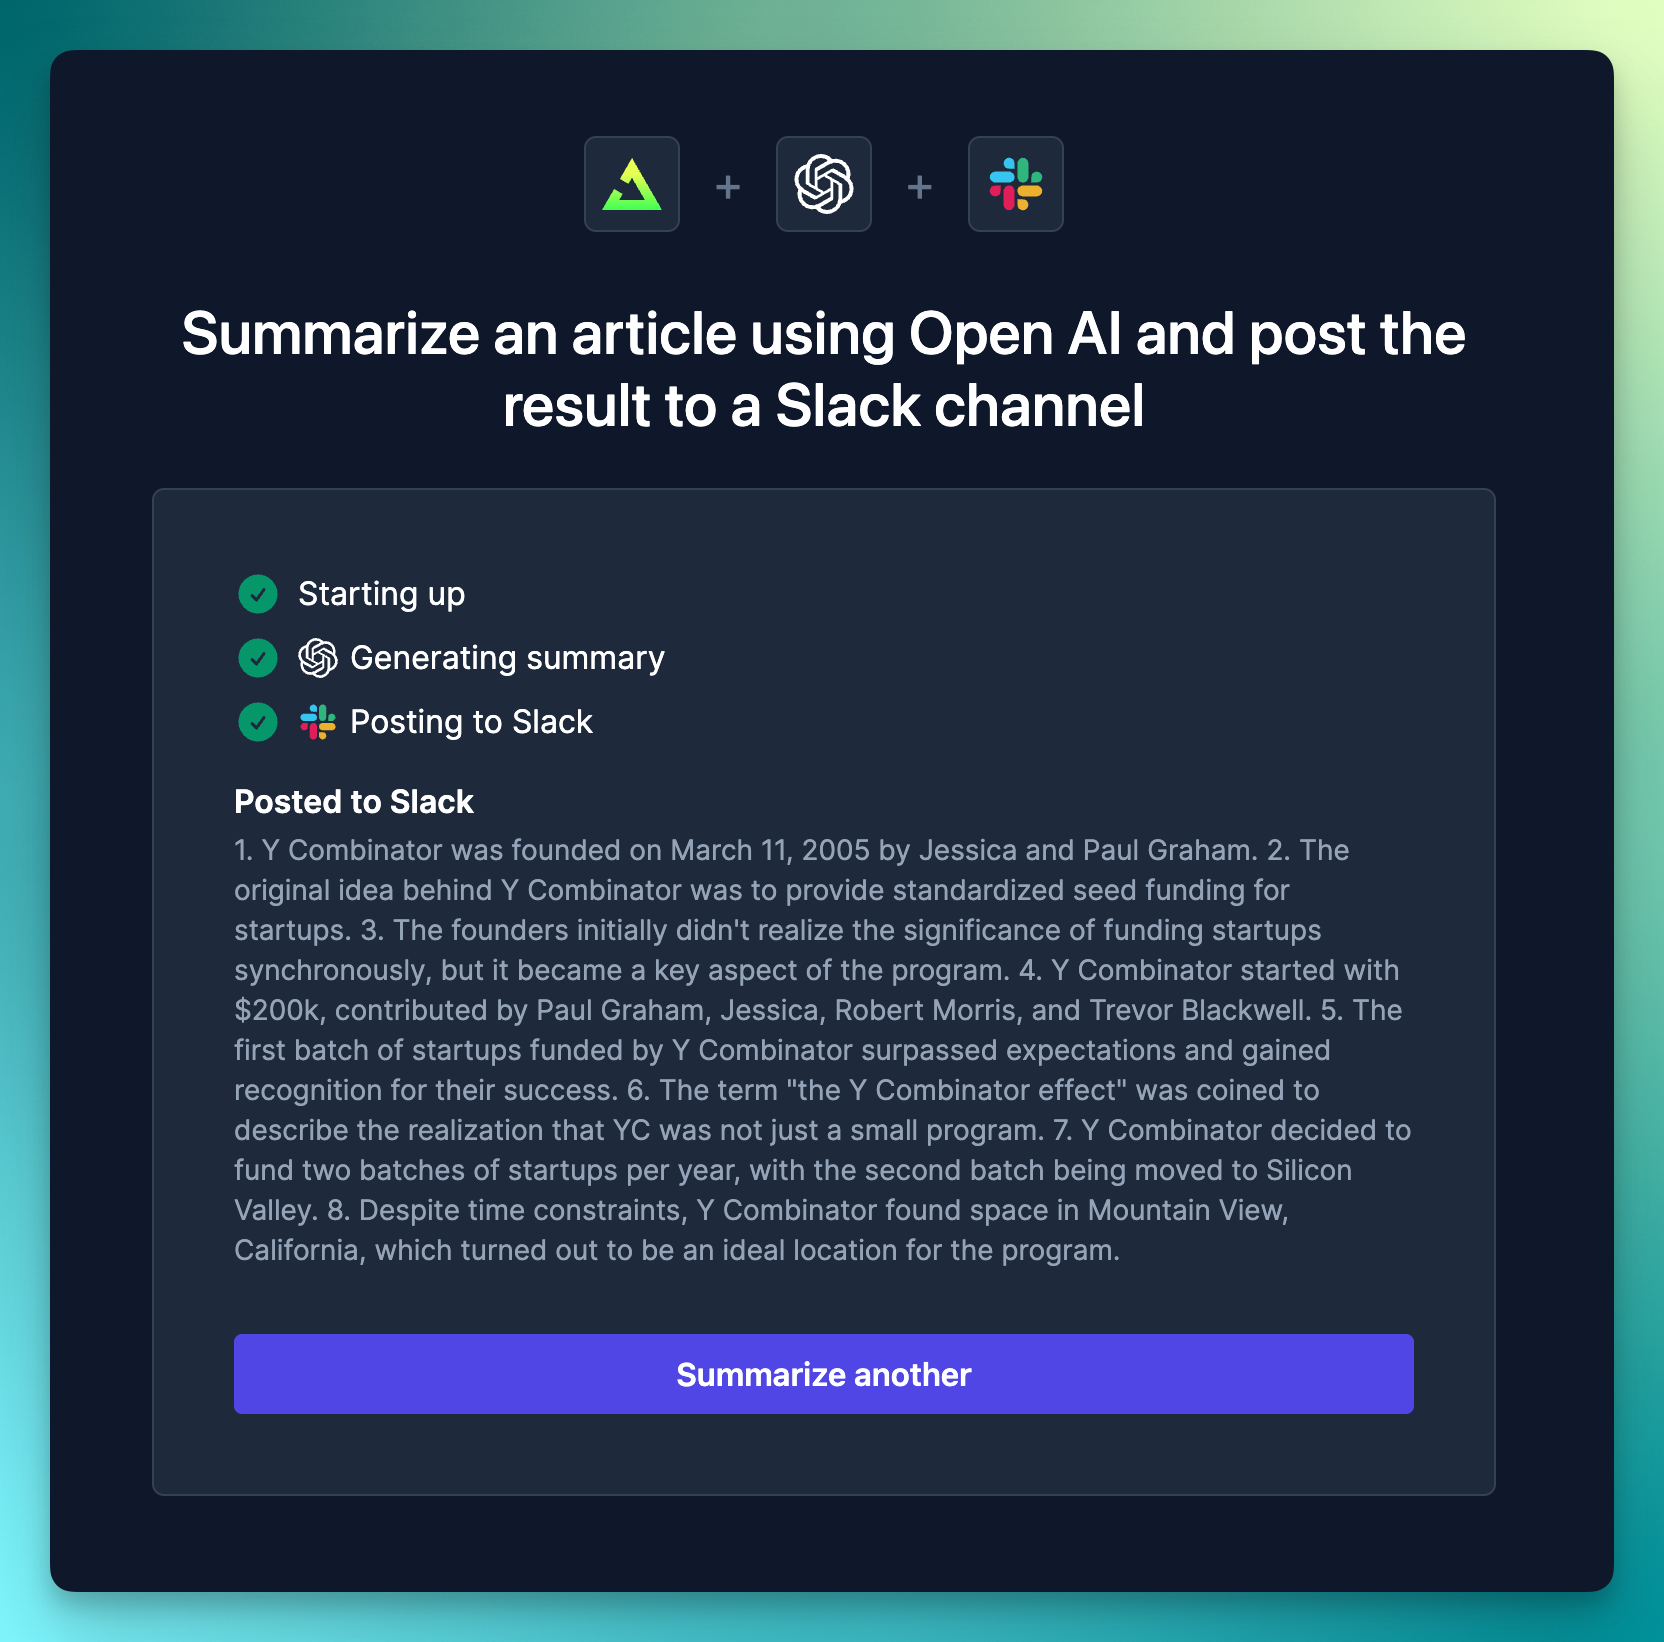
This updates live as the Job progresses, until we show the "Posted to Slack" output
Setting up your project for hooks
This guide assumes that your project is already setup and you have a Job running. If not, you should follow the quick start guide first.Get your public API key
In the Trigger.dev dashboard you should go to your Project and then the “Environments & API Keys” page.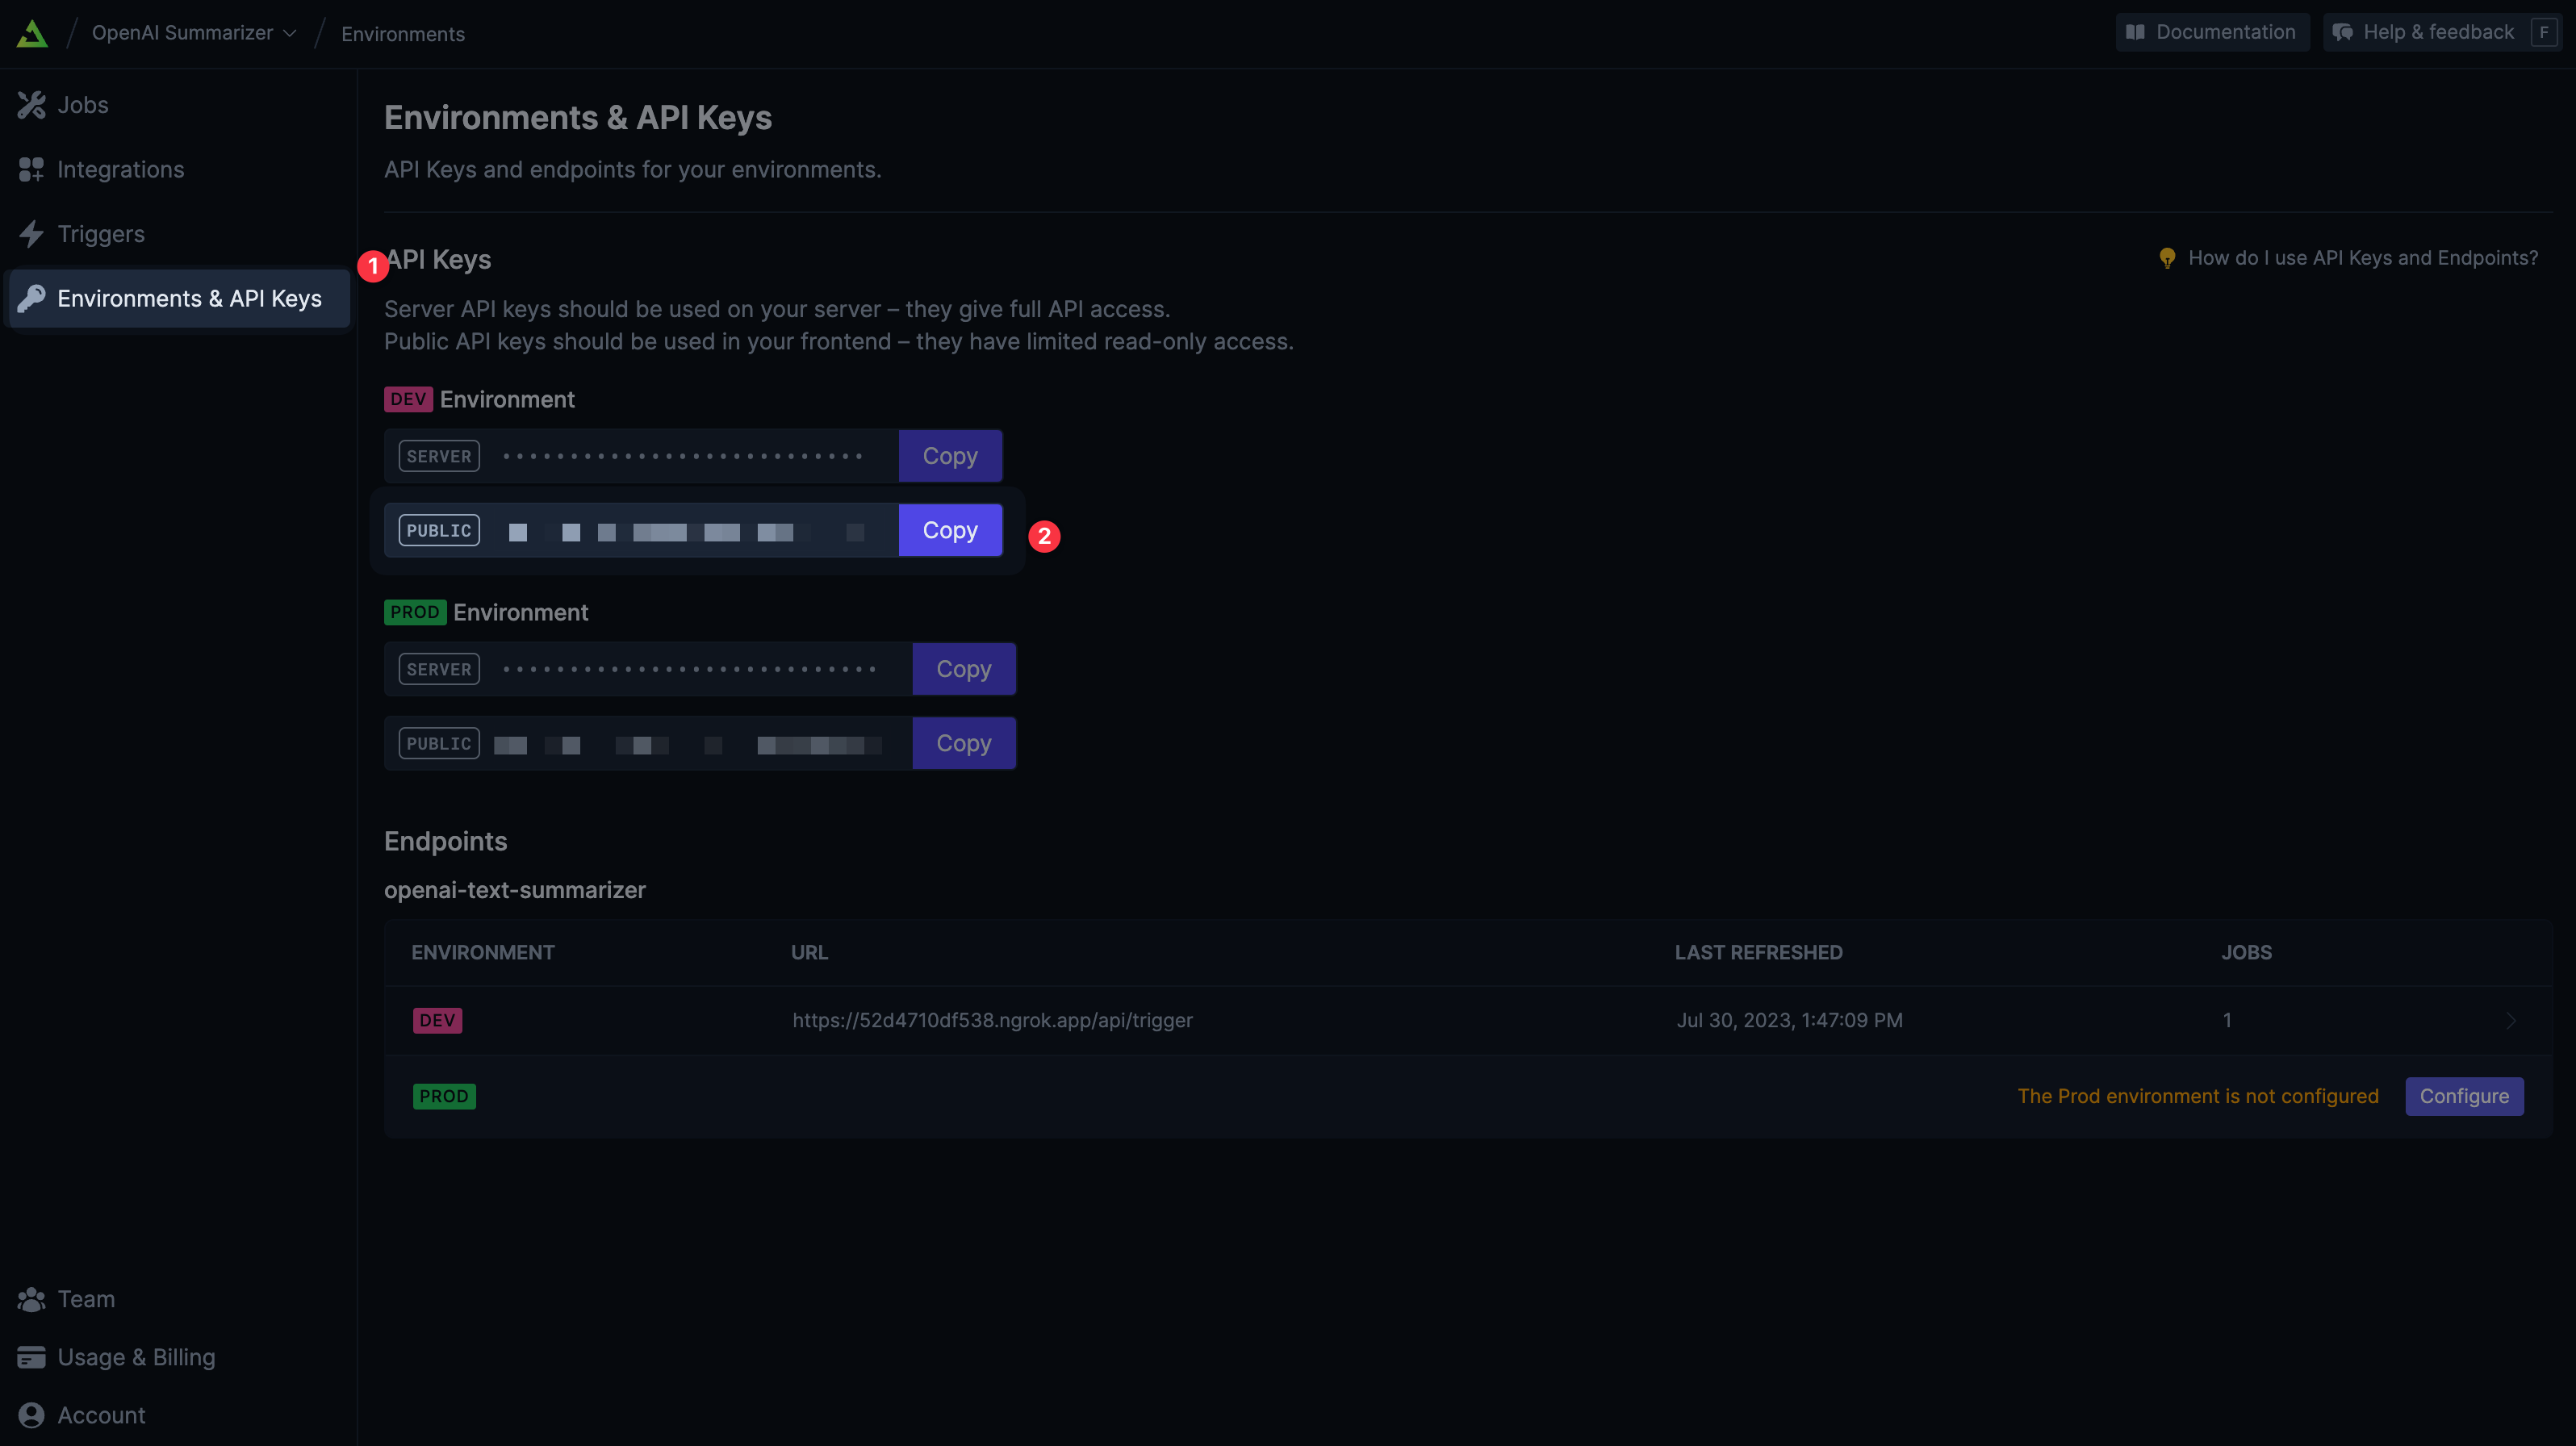 You should copy the
You should copy the PUBLIC API key for the dev environment.What's a public API key?
What's a public API key?
A public API key is a key that can be used in the browser. It can only be used to read certain
data from the API and can not write data. This means that it can be used to get the status of a
Job Run, but not to start a new Job Run.
Setting up environment variables
- Next.js
- Remix/React
Add the Your private API key should already be in there.
NEXT_PUBLIC_TRIGGER_PUBLIC_API_KEY environment variable to your project. This will be used by the TriggerProvider component to connect to the Trigger API..env.local
NEXT_PUBLIC_ is a special prefix that exposes the environment variable to your users’ web browsers.Add the <TriggerProvider> component
The TriggerProvider component is a React Context Provider that will make the Trigger API client available to all child components.Generally you’ll want to add this to the root of your app, so that it’s available everywhere. However, you can add it lower in the hierarchy but it must be above any of the hooks.
- Next.js
- Remix
app/layout.tsx
Two ways to report Run progress
Automatic progress – without writing additional code in your Job you can get updates on the overall run status and individual tasks inside the run. Explicit status – add code to your Job that reports the status of the things you’re doing. This gives you full flexibility for displaying progress in your UI.Automatic hooks
Receive coarse updates without writing additional Job code
Explicit status hooks
Add statuses to your Job code for fine-grained UI updates